Fence Stain Before and After

Do you have an old, tired-looking fence that’s in need of a revamp? Staining your backyard fence is one of the easiest and most affordable ways to add value and style to your outdoor space. But before going ahead and choosing from the wide array of colors, it's nice to know how fence staining works and what you can expect after a wood stain.
We'll try to give you insight on how wood staining can give your fence a vibrant new look, and also find out which stain types are best suited for different climates conditions.
Overview of Fence Staining Process and Benefits
As homeowners, we all dream of having that serene and stylish backyard oasis. Sadly, it usually comes with the added stress of maintaining it, with one of the biggest culprits being the fence. The constant exposure to harsh weather conditions and the natural wear and tear can cause your fence to look weathered and unattractive, ultimately affecting the overall beauty of your garden.
Enter fence staining, a process that not only revives the appearance of your fence but also adds a protective layer against damage-causing elements. The best part? You can choose a color that perfectly matches your house’s aesthetic, or even better, be bold and create an accent feature for your yard. The options are endless, and the benefits are undeniable. Say goodbye to the eyesore and hello to a stunning backyard.
Guide to Choosing the Right Stain Color for Your Home
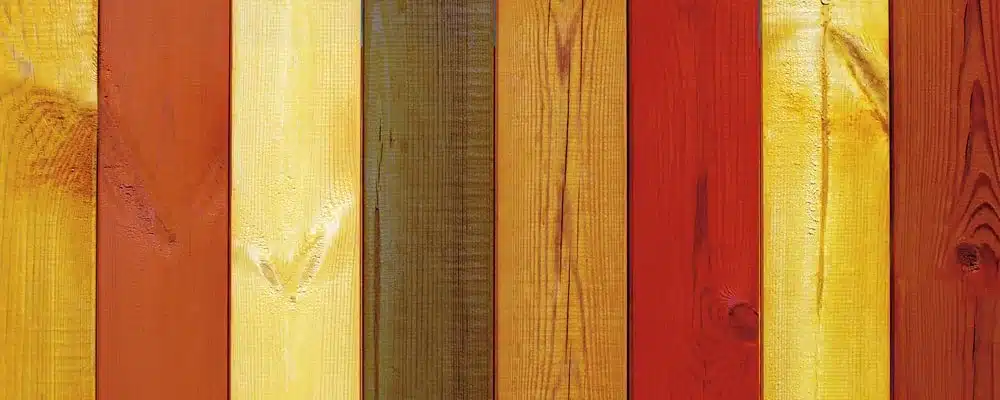
The color of your fence stain will depend on what kind of finish you'd like. Whether it be semi-transparent, solid, or semi-solid, there's a color that fits your style.
Semi-transparent stains allow the natural grain of the wood to show through and are best suited for new fences; they come in an array of colors ranging from warm to cool.
Solid stains are highly pigmented and provide an opaque finish that hides the grain; they come in dark, rich hues like mahogany and ebony.
Semi-solid stains offer a balance between semi-transparent and solid; they don’t cover up the wood as much and come in neutral colors like taupe and greige.
How to prepare for staining your fence?
The key is to make sure the wood is clean and dry before applying the stain. It’s important to inspect the fence for any blemishes or rot, which can be caused by insects, weather exposure, or age. If there are any damages, it's best to repair them first.
Once that’s done, you can scrub the fence with a pressure washer or a brush and cleaner to remove any dirt, debris, dust, and mildew. It’s also important to sand down any rough patches and make sure there are no leftover splinters before staining.
Step-by-Step Instructions for Applying Fence Stain
1. Start by stirring the stain in the can to ensure a uniform color.
2. Dip your paintbrush into the can and apply a generous coat of stain onto the fence, working from top to bottom.
3. Let it dry for at least an hour before applying another coat of stain. It’s best to give the fence at least two coats of stain for a better finish.
4. Once the fence is dry, you can add any decorative accents or trim that you wish.
What to Expect After Fence Staining
After properly prepping and staining your fence, you can expect a beautiful transformation that will last for years. Staining not only provides an aesthetic boost but also increases the life of your fence. It protects against rot, warping, cracking, and fading caused by UV rays.
It's important to remember that all wooden fences require upkeep, so make sure to re-stain every few years to keep it looking sharp. With proper maintenance, your fence will remain an inviting and eye-catching feature in your backyard.
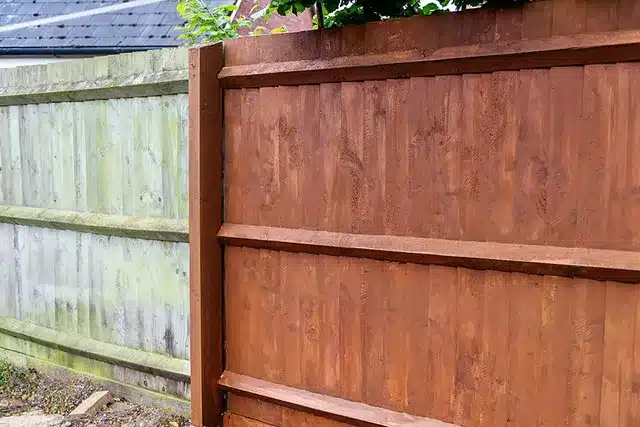
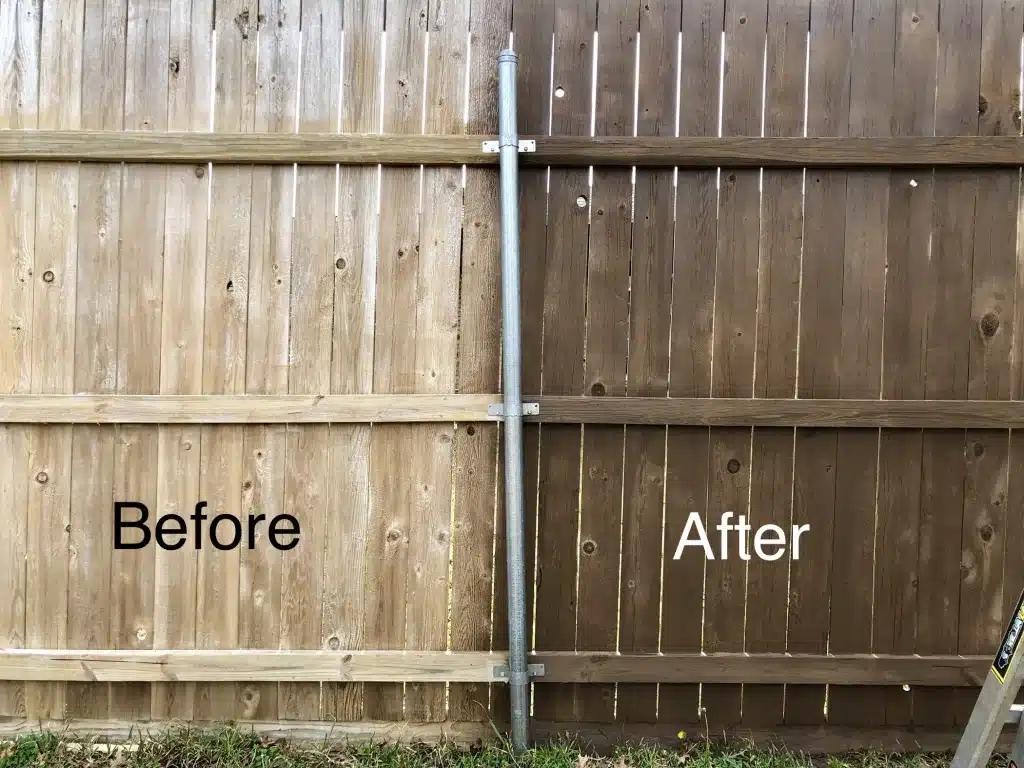
Before and After Photos Showing Dramatic Transformation With Fence Stain
Transformations are always thrilling to watch, especially when they're as dramatic as those achieved by a fresh coat of fence stain. Before and after photos showcasing the transformation of a weather-beaten fence into a stunning new centerpiece are truly a sight to behold.
Witnessing the before and after transformation can inspire you to take on much-needed home improvement projects and truly transform your outdoor space. So, why not take the leap and see what kind of dramatic change you can achieve with a fresh coat of fence stain?
Maintenance Advice for Keeping Your Fence Looking Its Best Long-Term
Treat your fence like the valuable investment that it is. After all, it serves an important function by providing privacy and security to your property. With regular maintenance, you can ensure that your fence looks its best for years to come.
Start by inspecting your fence for any signs of damage, such as loose boards or rust. Fix these issues quickly to prevent them from worsening. Additionally, keep your fence clean by power washing it and removing any debris or vegetation that may be growing on or around it.
With fence staining, you can make a dramatic transformation to your home’s exterior and create a space that stands out and is reflective of your desired style. Applying the stain is no easy task, however; it requires planning, prepping, and plenty of effort. But if you’re ready to roll up your sleeves and dive into the project head-on, then follow our step-by-step instructions for applying the stain and purchasing the right color for your residence.